NEAR / USDT
0.99956 (-0.00023072473452002%)
COIN PRINTING

NEAR / USDT
0.99956 (-0.00023072473452002%)

STX / USDT
0.99956 (-0.00023072473452002%)
NEAR / USDT
0.99956 (-0.00023072473452002%)
STX / USDT
0.99956 (-0.00023072473452002%)
NEAR / USDT
0.99956 (-0.00023072473452002%)
STX / USDT
0.99956 (-0.00023072473452002%)
NEAR / USDT
0.99956 (-0.00023072473452002%)
STX / USDT
0.99956 (-0.00023072473452002%)
NEAR / USDT
0.99956 (-0.00023072473452002%)
STX / USDT
0.99956 (-0.00023072473452002%)


Step 1
Step 2
Step 3
Step 4
Step 5
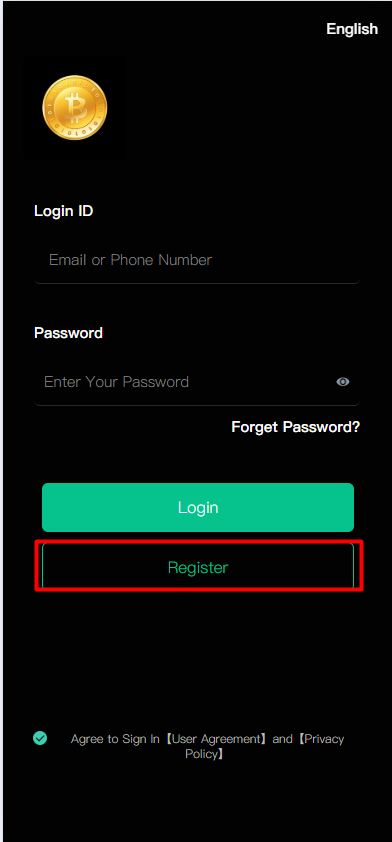
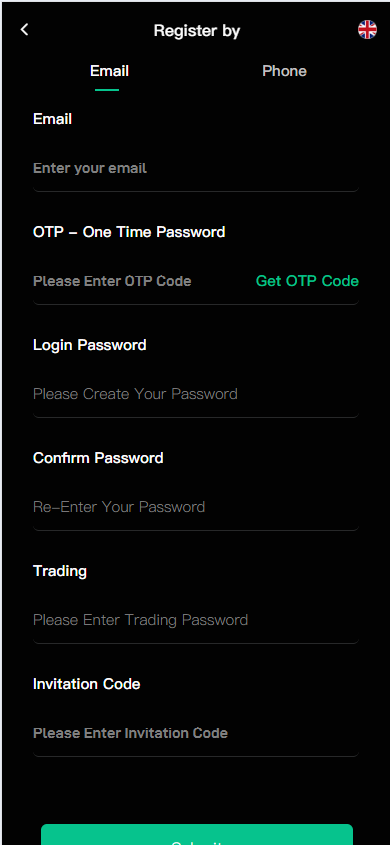
First, open the Coin printing interface and click "Register". Choose email registration and complete the registration according to the system prompts!
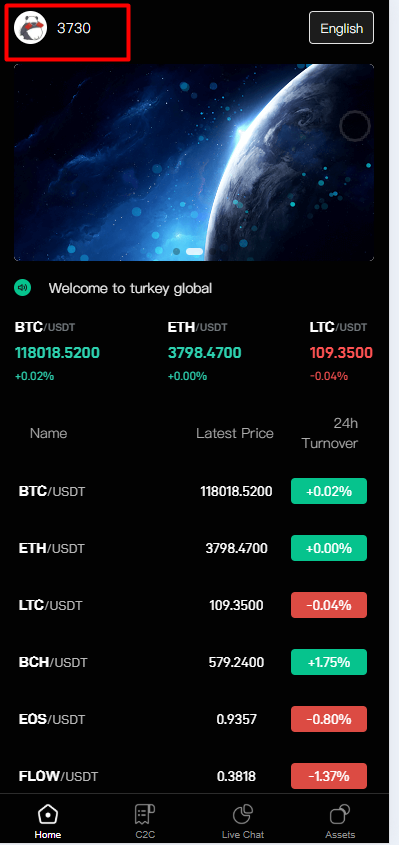
The top right corner shows your exclusive UID (UID is your account's unique authentication and cannot be modified).
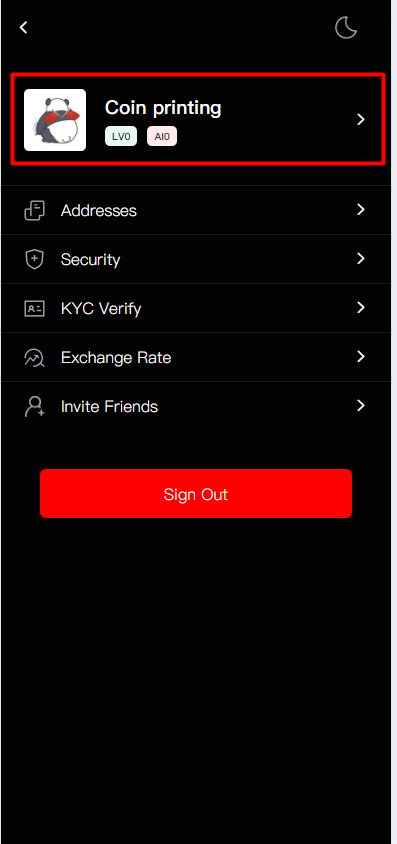
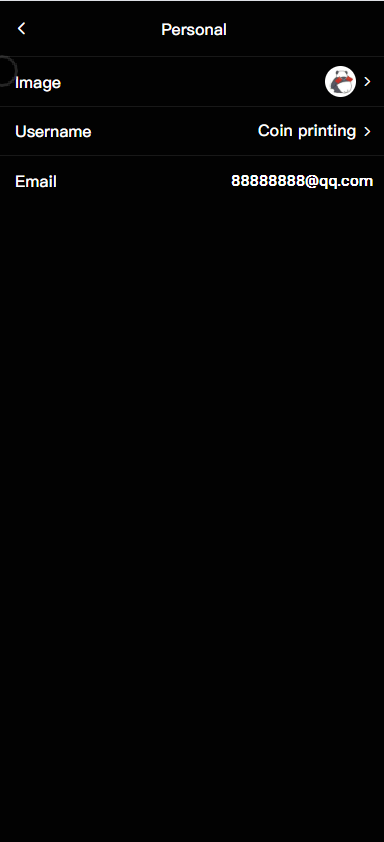
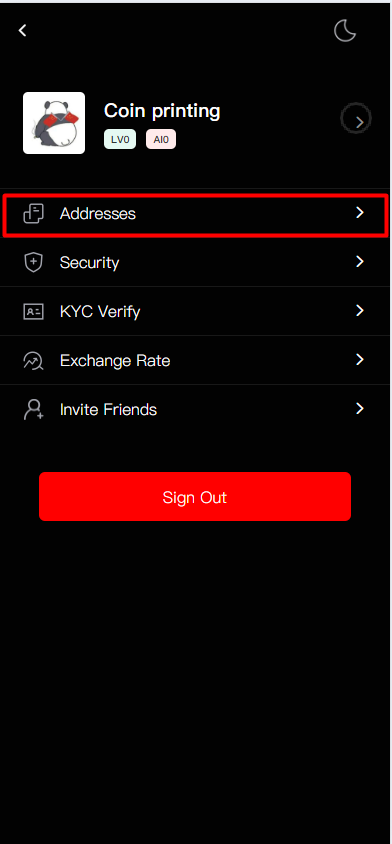
Click on the avatar in the top right corner to enter your personal profile interface, where you can modify your name and avatar!
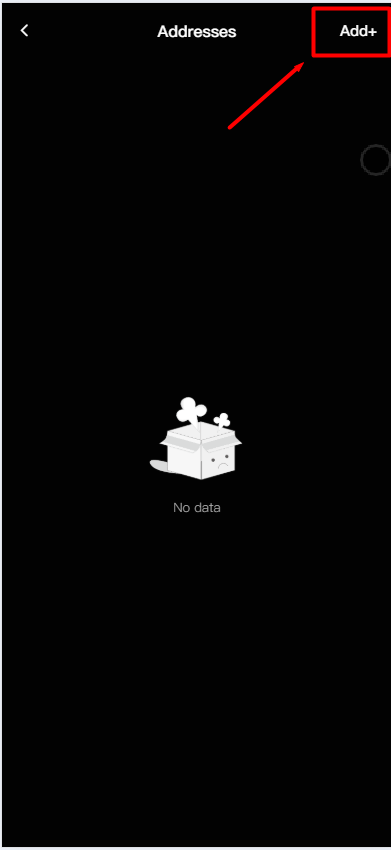
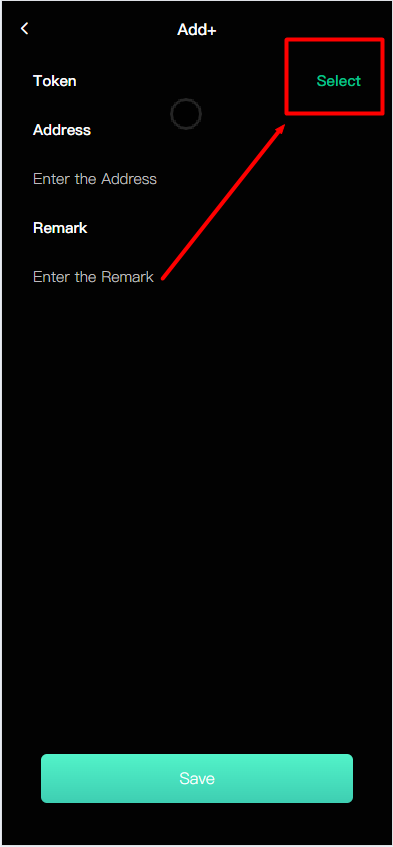
Click "Bind Address", then click "Add New". Select the token type and click TRC-20.
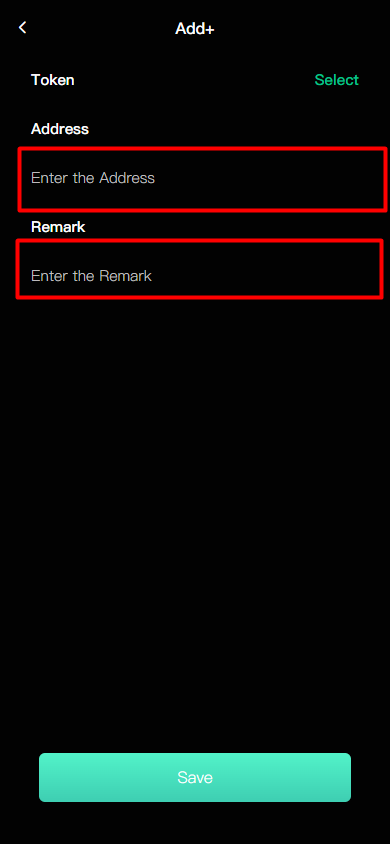
Enter your TRX-20 address, add a note to remind you of the address purpose, then click "Complete Binding"!
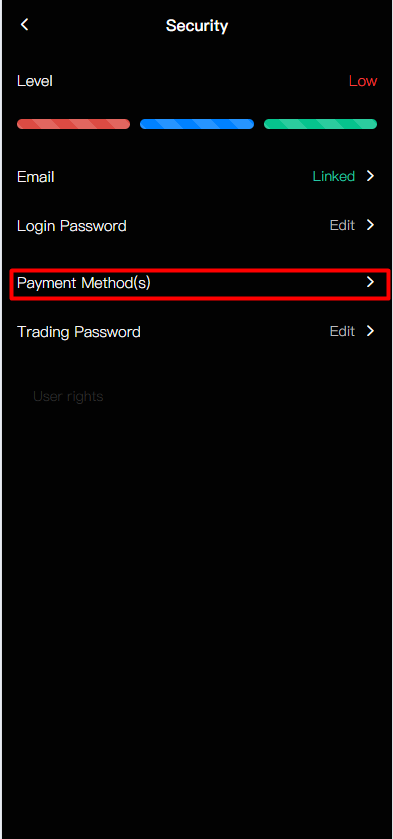
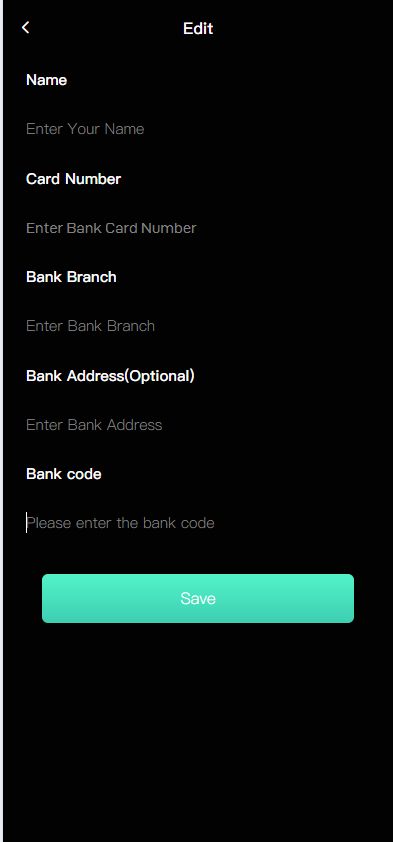
Click "Security Center", select "Bind Bank Information", and complete your account information according to the system. Bank attributes need to be clearly filled in, and you can add multiple bank accounts!
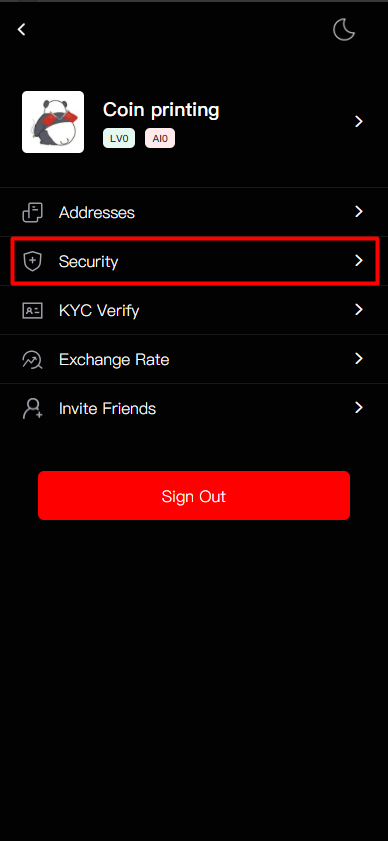
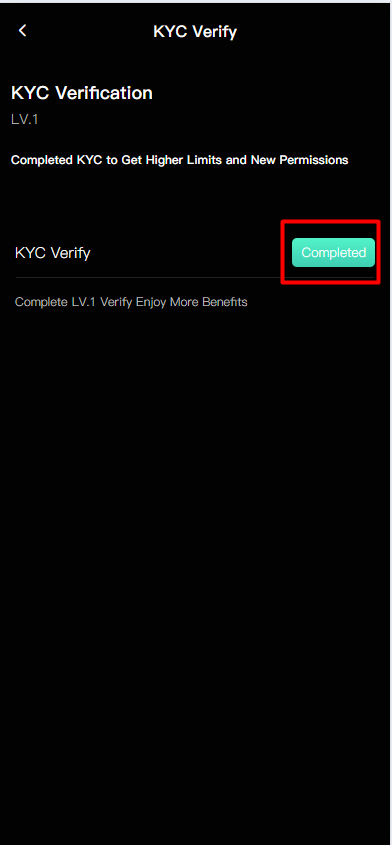
Click "KYC Verification", then click "Verification Information" to complete your real-name verification. TG and WS information must be filled in with real information for direct contact!

After completing the basic profile setup, let's start learning how to begin your money-making journey!
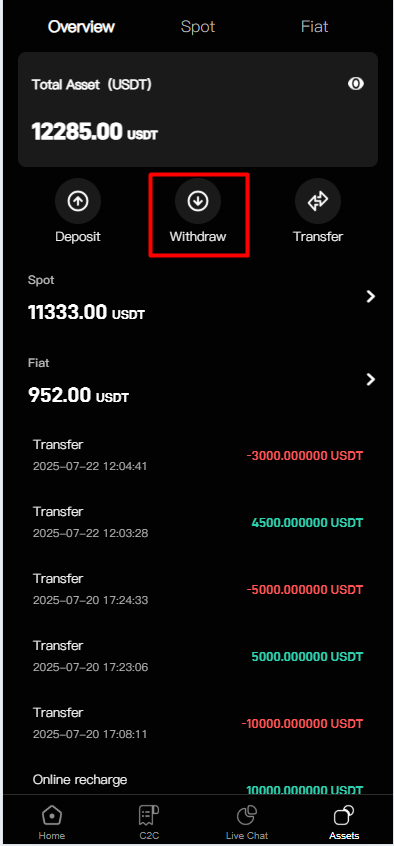
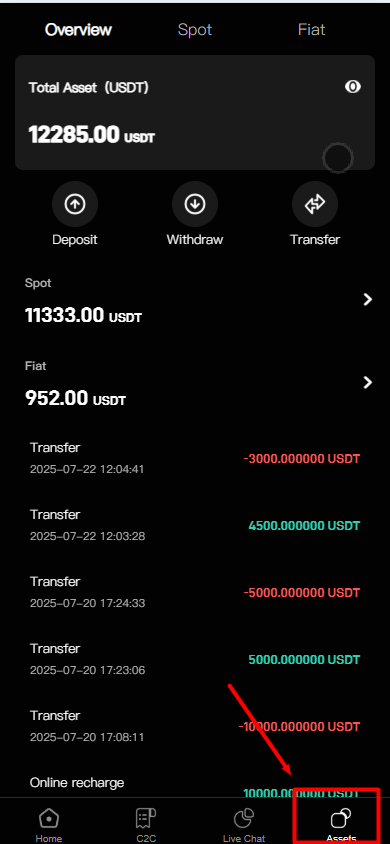
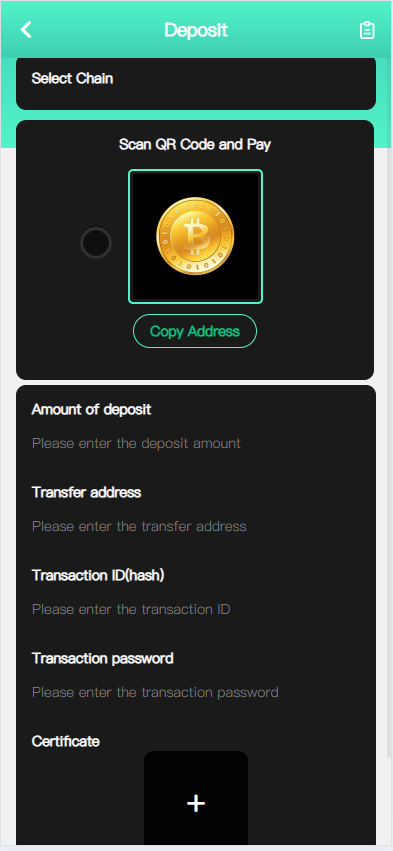
Click "Assets", select "Deposit", you'll see the system's deposit information. Click "Copy Address", then in your exchange, select TRC-20 deposit option to complete the deposit. Copy your transaction hash and fill it in the Coin printing details, then upload your deposit details and wait for automatic system review!

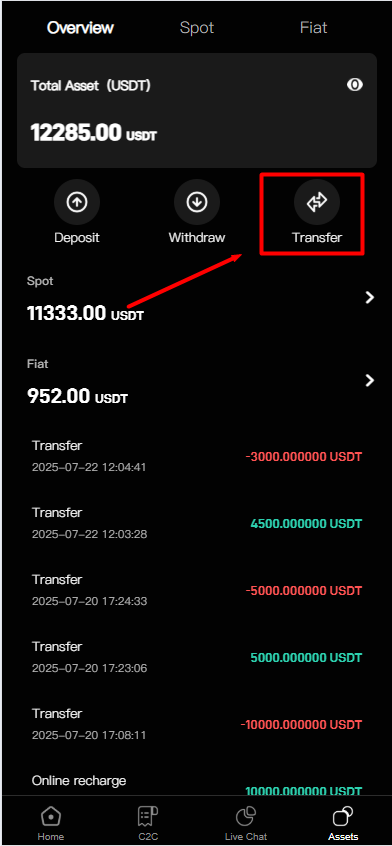
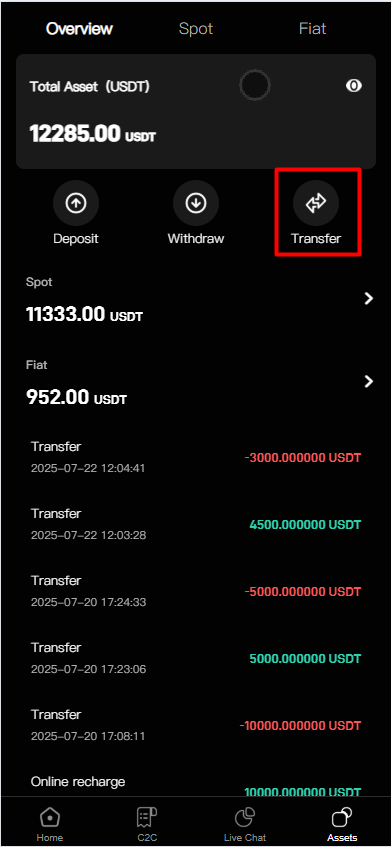
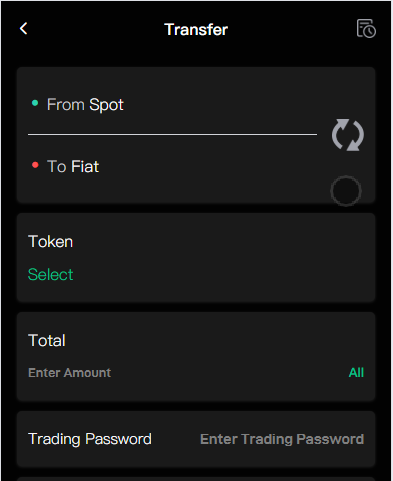
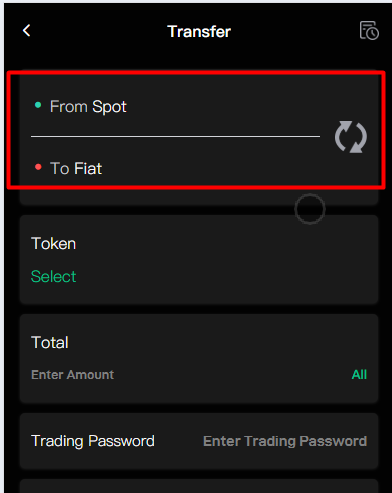
After completing the deposit, you need to click "Transfer" to move your funds from the spot account to the fiat account!
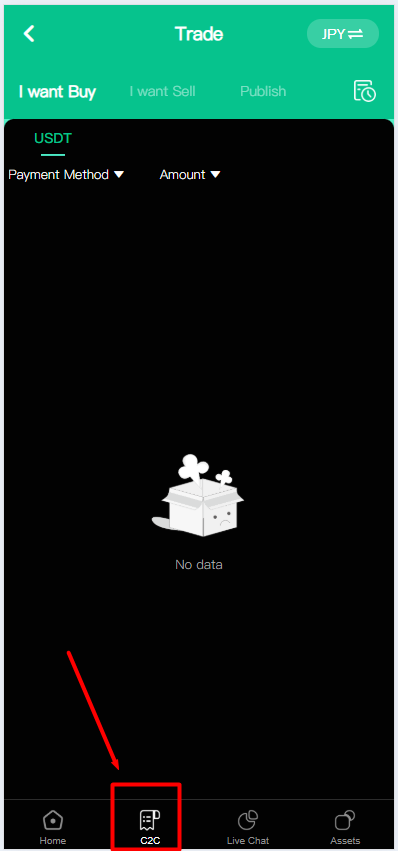
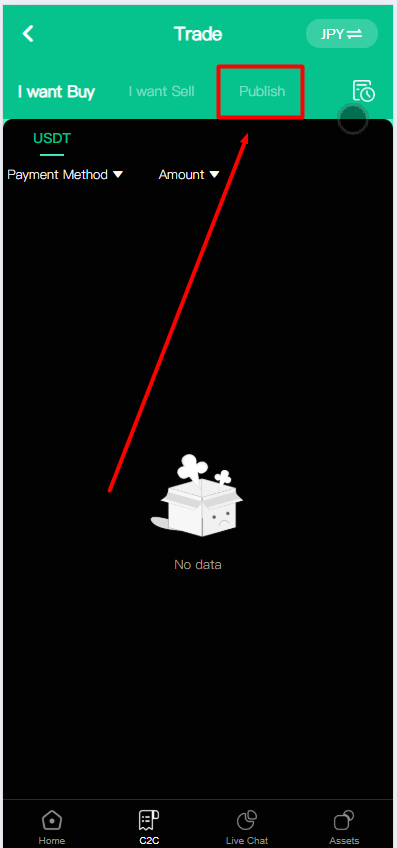
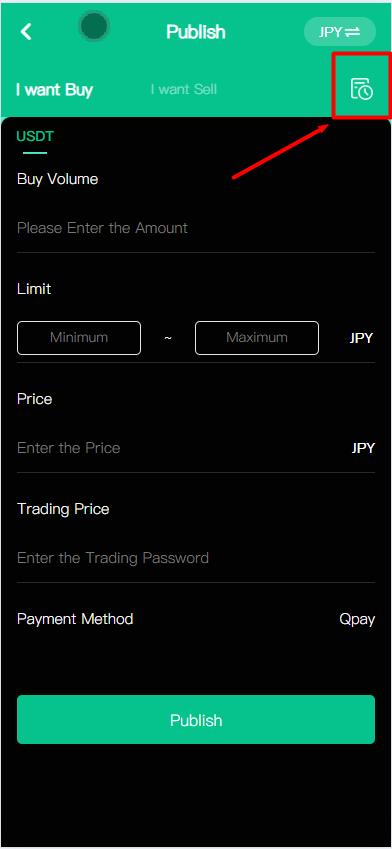
After completing the above steps, you can return to the homepage and click C2C to start your trading journey!
This is the complete tutorial for publishing trades!
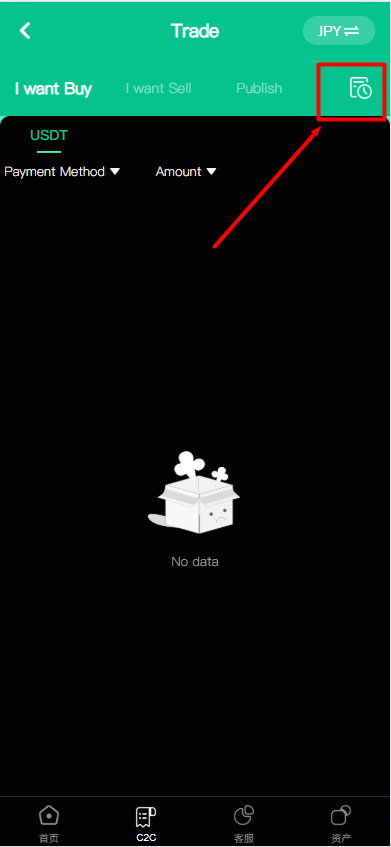
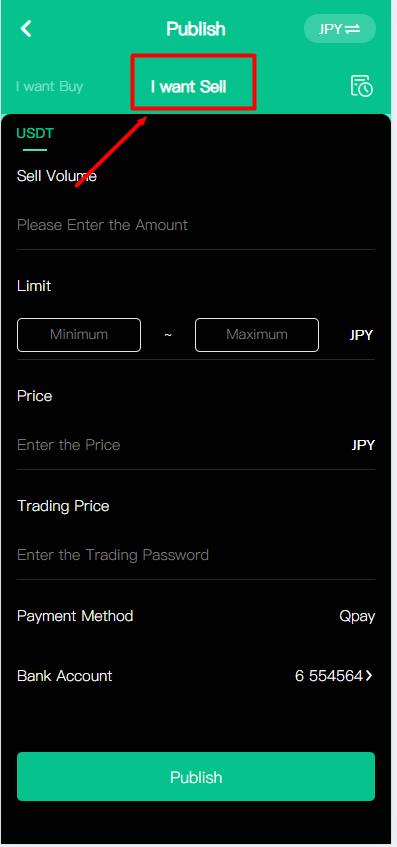
Click "C2C", click "Publish Order", then click "I Want to Sell". You'll see the trading details to fill in. Enter the USDT amount you want to sell, fill in the minimum and maximum selling amounts (maximum cannot exceed your total account assets).
Next, you'll see your trading price. The price means the value of each of your USDT. After completing the trading information, click "Publish" to successfully publish the trade!
When your order is purchased, check if your bank account received the corresponding amount. After receiving the funds, click "Release Order" here! If you want to cancel your order, you can click "Publish Order" to see your unsold orders and cancel them according to system prompts!
Next, let's learn how to withdraw your USDT!
Your cancelled order USDT will be stored in the fiat account. You can continue to click "Transfer" to move your funds from the fiat account to your spot account!
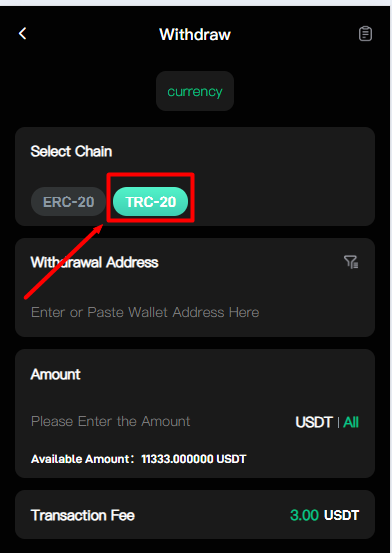
Then click "Withdraw", select TRC-20, choose your already bound address, and click "Withdraw" to wait for automatic system review!